Pattern review: Merchant & Mills - The Florence
- Emma Cartmel
- Jun 23, 2023
- 7 min read
Updated: May 3, 2024
Versatile. Timeless. Super comfortable. The perfect addition to anyones wardrobe!
You could say I am a little obsessed with this pattern. I have made the Florence dress twice, and I have just completed the top. I am pretty sure it won’t be my last of either!
The Florence fits my style to a tee. It is quite minimal in design, with the interest created in high-low gathers. It is oversized and swingy (you would rarely catch me wearing something fitted), and it lends itself perfectly to be being made from linen (my favourite)!
Having had a little practise, I thought it was about time I shared my experience with this pattern and provide an overview of this beautiful and versatile dress and top.
A wrap-up of this review
The makers: Merchant & Mills
Let's begin with a little background on the makers, Merchant & Mills.
The company was founded in 2010.
They are based in the United Kingdom with a store in East Sussex. Their products can be purchased online through their website, which offers worldwide shipping, and via a number of stockists located across the globe.
Their product offering includes sewing patterns (dressmaking and bag making), fabric and tools.
They focus on slow, not trend driven, sustainable fabrics and patterns that you will wear for a long time.
The Merchant & Mills website is not only beautifully designed but really inspiring. The site includes a large range of quality photographs of the completed patterns utilising a variety of their fabrics, and in a range of sizes.
A simple search of their fabrics' and patterns' hashtags (e.g. #florencedress or #florencetop) will return a number of results, also providing a great source of inspiration.
The quality of their products is unsurpassed! I can personally vouch for this, having bought a number of different patterns, fabrics and notions from them. They also arrive beautifully packaged (plastic free of course)!
Head to their website (linked above), check out their social media @merchantandmills, or if you are lucky enough to be in the area, check out their Rye store in East Sussex, UK!
The pattern
I have been a customer of Merchant & Mills for some time now. However, the Florence was actually the first pattern of theirs that I had worked with.
The pattern is available in both paper and PDF formats (sizes UK 6-18 and 18-28), and can be purchased via the pattern page of the Merchant & Mills website, or a number of stockists located worldwide.
When ordering the paper version of this pattern you will receive:
Full A0 printed patterns on white tissue paper. The tissue paper is really easy to work with, especially when it comes to pinning, and you can also iron out any creases (carefully)!
4 pages of double sided A4 instructions. The instructions are really easy to follow, using simple and easy to understand language. Each step is also accompanied by a clear diagram. The only downside, is that the instructions come as loose sheets, not as a booklet, which just makes it a little tricky to keep in order and follow at times (I am being picky here!).
The printed patterns and instructions come in a beautifully minimal pattern envelope, featuring a simple flat lay image of the dress on the front. The reverse of the envelope includes the essential information, including technical drawings, fabric requirements, sizing and finished garment measurements.

The pattern includes two versions - the cropped style top and the dress. Overall the design of both is fairly minimal with the interest created by the gathered frills, and the centre back placket with buttons.
In particular, the design features include:
Back shoulder darts.
Concealed neck binding.
Centre back placket with three buttons (15mm), finished with top-stitching.
High-low gathers at front and back.
Deep(ish) double rolled hems.
Fabric and notions
It is recommended to select a lightweight fabric that has some drape, for example a cotton, Tencel, or linen. I have used both a lightweight cotton double gauze, and a laundered linen for this patten, finding both to work really nicely.
To complete this top and dress you will also need matching thread, 3 x 15mm buttons, 0.3m fusible interfacing, and either a fusible interfacing tape or standard seam tape.
As I mentioned previously, I have made this pattern 3 times now (2 dresses, and 1 top). So here is a brief overview of the fabric and notions I selected for each version, and why.
Dress (version 1)
I chose Merchant & Mills' 100% GOTS, and Oeko-Tex certified black organic cotton double gauze. This fabric essentially comprises of two layers of fine, open weave cotton, attached together with tiny stitches in a grid like pattern (this stitching is not visible). This fabric is super lightweight, so lends itself perfectly to a floaty style like this, and is perfect for those warmer months. I also found the crinkle texture of the fabric that little more forgiving, requiring less ironing. Therefore this fabric is perfect for travelling, an bundling up into a suitcase!
For the centre back placket, I went with the Merchant & Mills' 15mm organic cotton buttons in black.
Dress (version 2)
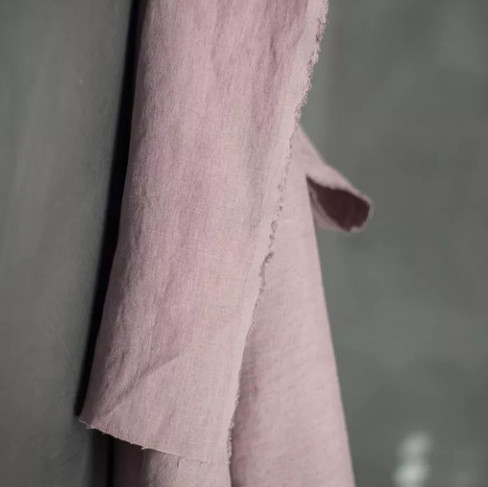
For my second version of this dress I went with another Merchant & Mills fabric, choosing their 100% GOTS, and Oeko-Tex certified European laundered linen in Calamine (a pale pinky grey, with lilac tones). This fabric forms part of their 185 linen stock range. I love linen so the fabric composition was a no-brainer for me, and I had been seeing this colour everywhere in the shops at the time and just loved it.
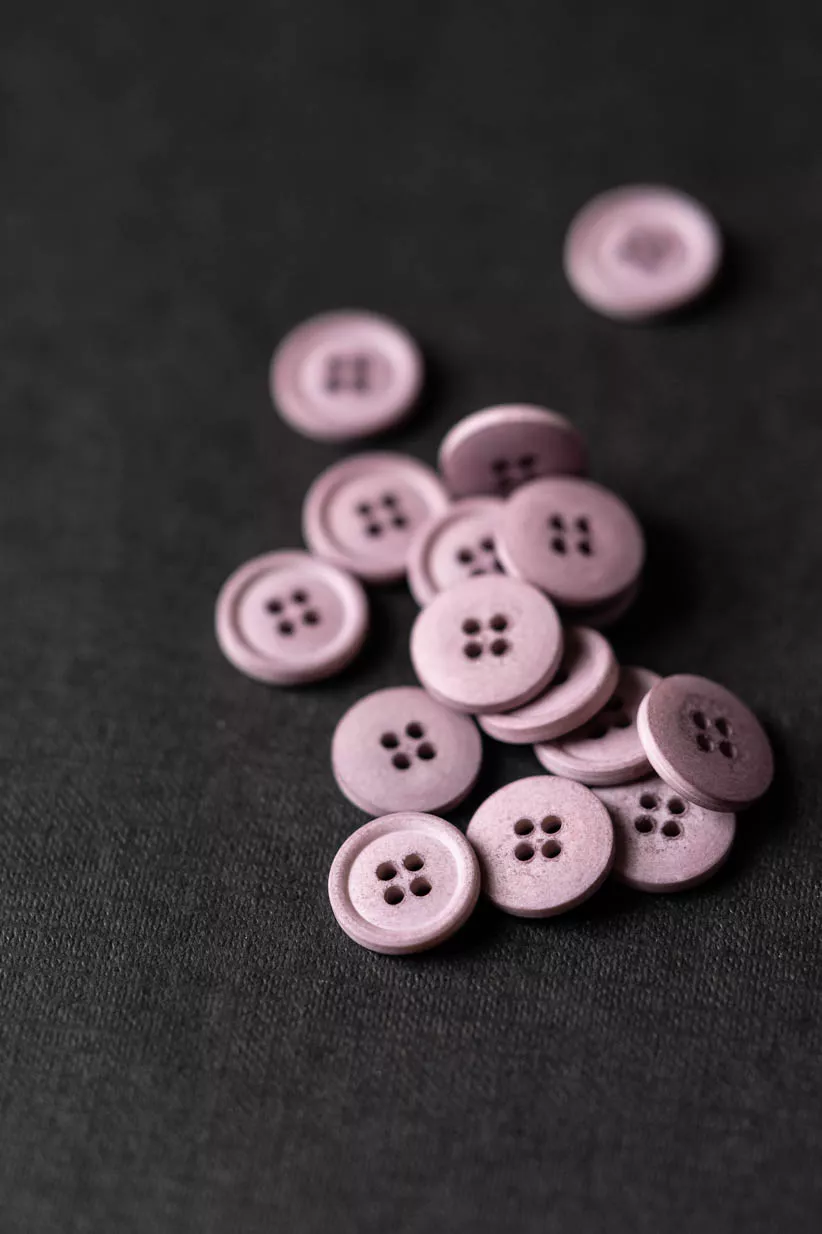
Merchant & Mills offers a range of buttons that have been dyed to match this stock range of linen fabrics. This makes the decision process much easier for patterns such as this (especially when buying online). Therefore, I went with their matching 15mm organic cotton buttons in Calamine, that have a matte, chalky finish.
Top (version 1)
I had some gaps in my wardrobe when it came to tops, and I really wanted something that little bit more dressy, being perfect for work, or going out to dinner, while still being easily dressed down with jeans. I also wanted to add some more green to my wardrobe, as not only is it my favourite colour to wear, but easy to style with what I already own.
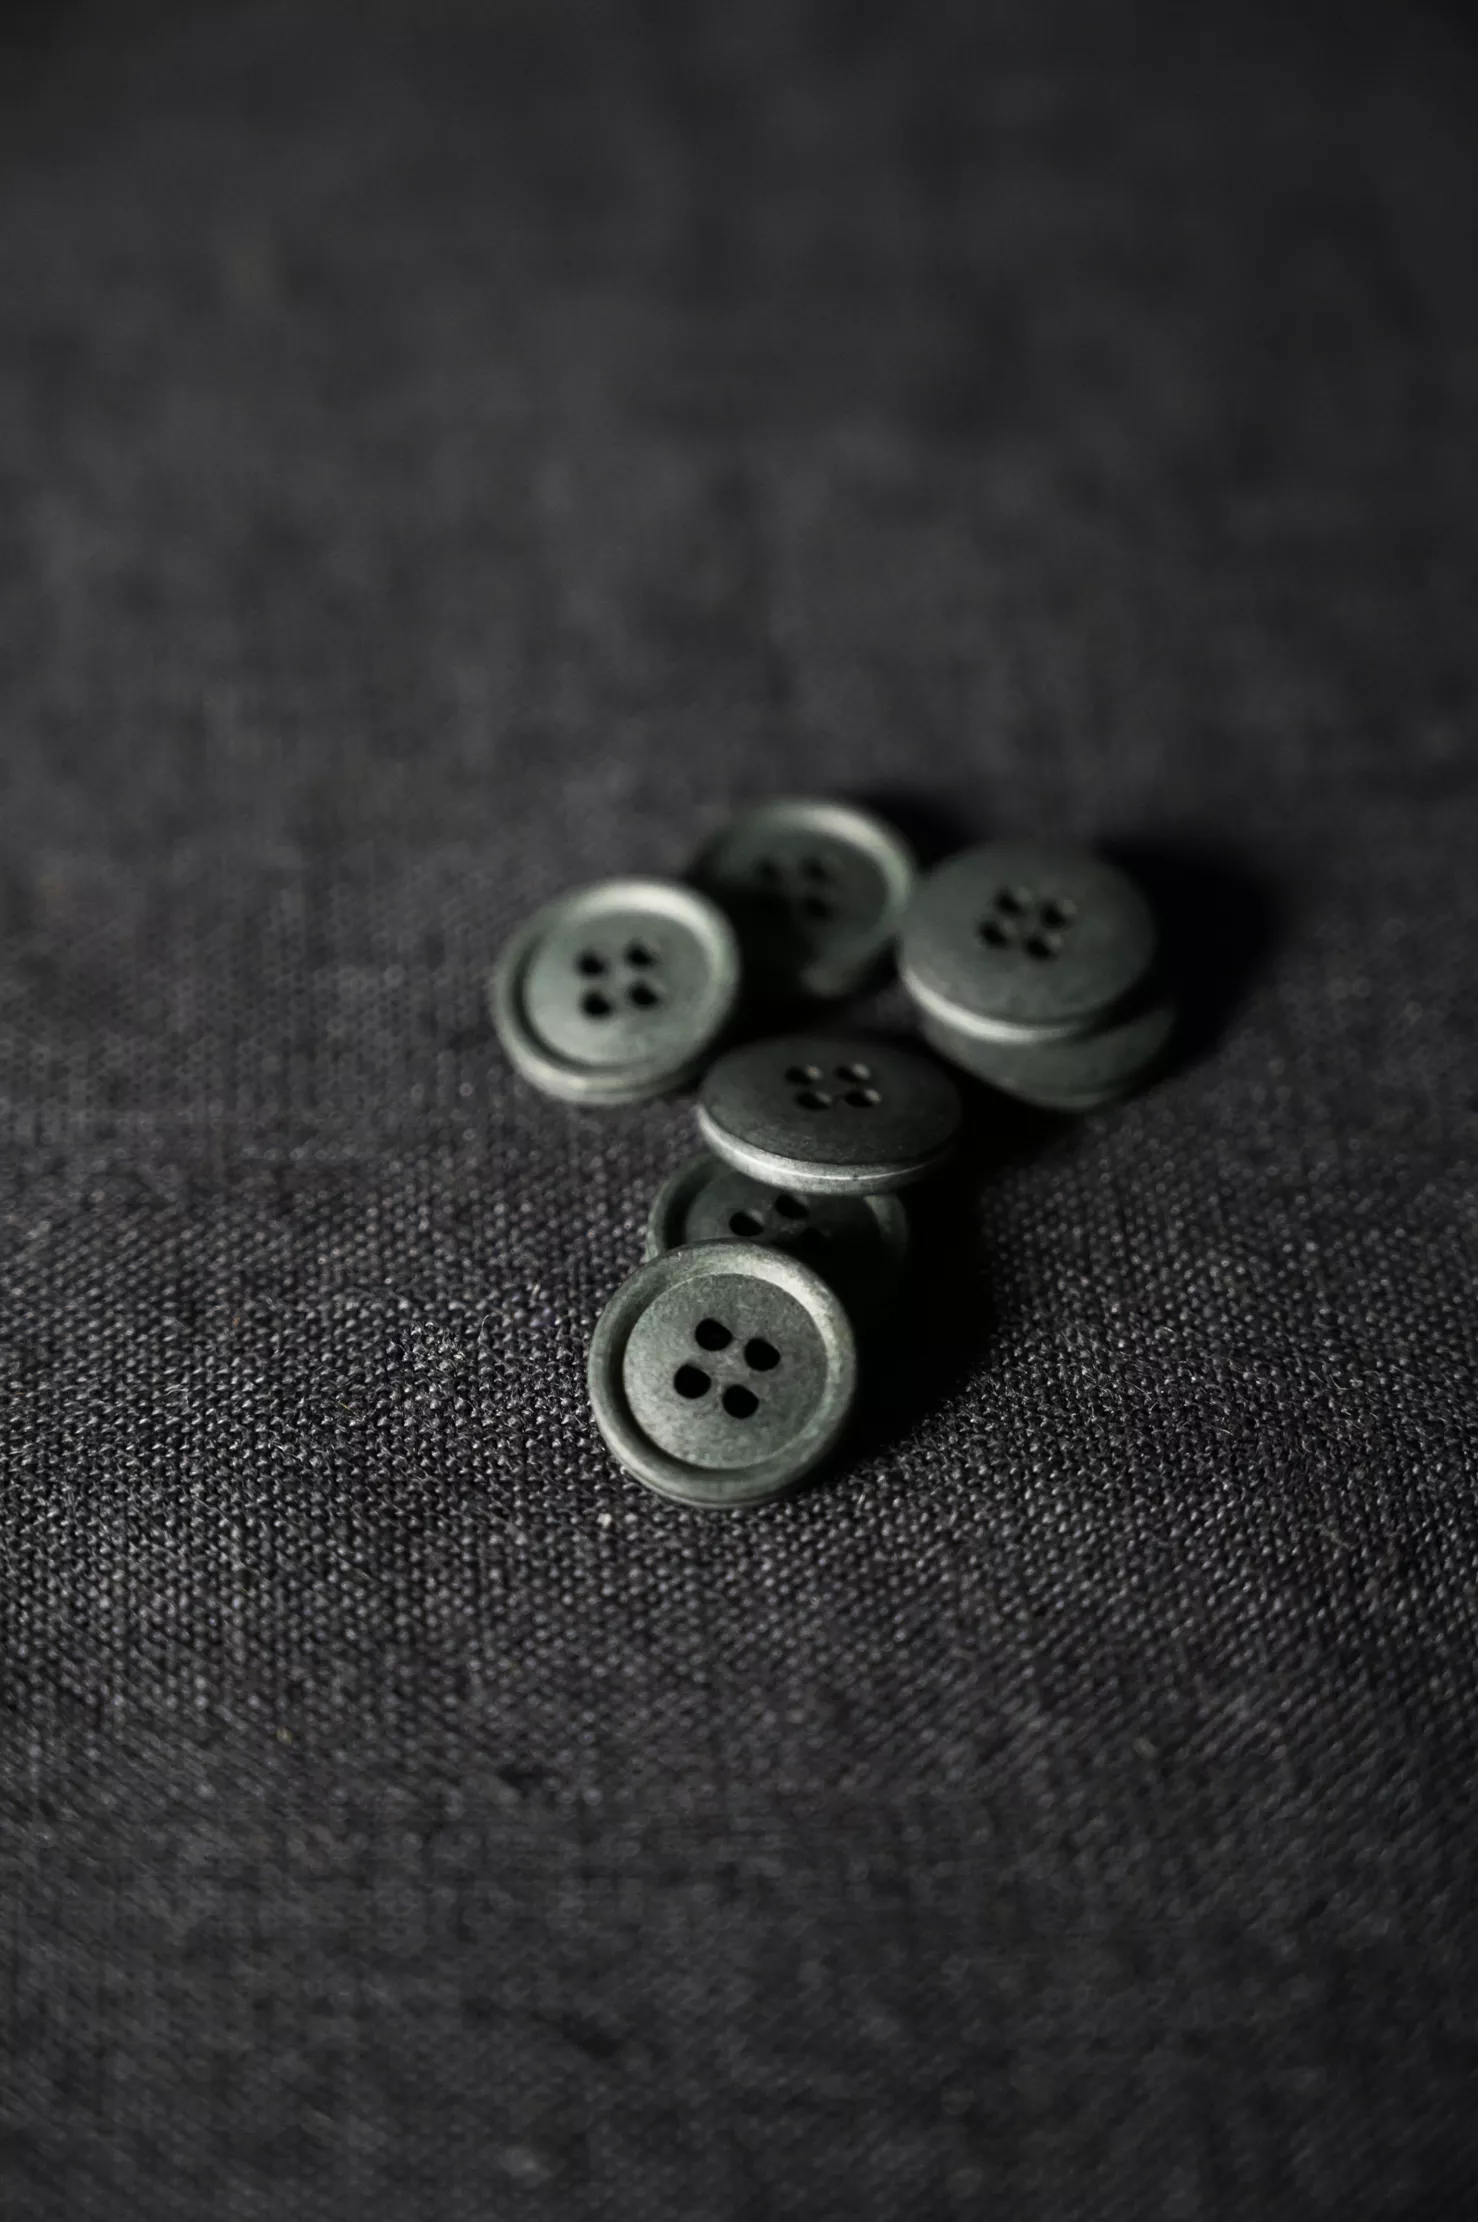
Therefore, I opted for another of Merchant & Mills’ European laundered linens, this time in Garden Slate (a green slate shade). I also opted for their matching 15mm organic cotton buttons in Garden slate, that also have a matte, chalky finish.
In case you haven't noticed, I love linen. If you are interested in finding out more about this wonderful fibre, check out my article 'Fibre focus: Linen'.
Cutting and layout
The pattern only consists of 6 pattern pieces:
Bodice front (cut on fold)
Bodice back
Sleeve
Front frill (cut on fold)
Back frill (cut on fold)
Neck binding
The layout and cutting is straightforward, fitting quite nicely within my 143cm wide fabric. This pattern will also work with narrower width fabrics, with the instructions providing cutting layouts for 110-150cm wide fabrics.
Fabric preparation
Once you have cut out the pattern pieces, you are only required to do a little prep work prior to commencing sewing of this top or dress;
Ensure you have transferred all pattern markings and notches. In particular, mark the shoulder darts, fold lines for the centre back placket, and the centre back button positions. I would also recommend adding some darts at the gathered edge of the frill and the lower edge of the front and back bodice to help ensure even gathers.
Reinforce the lower edge of the front and back bodice. You can use seam tape or a strip of fine selvedge to avoid the edges distorting. I have stay-stitched and used 1cm wide fusible interfacing tape (as photographed below) for this step and found both methods to work just fine.

Apply interfacing to the centre back for the placket (positioning indicated on pattern piece).
Fold and iron the neckline binding (instructions included).
Sewing
I would describe the Florence pattern as being for the advanced beginner sewer. The pattern will have you:
Creating a placket.
Sewing buttons and button holes.
Setting in sleeves.
Creating a lot of gathering.
Adding a neck binding.
Sewing a double rolled hem.
The sewing instructions aren’t the most detailed, but are well written and easy to understand. They are also accompanied by clear, easy to follow diagrams.

I particularly liked the the method of neck binding, where the binding itself is turned to the inside, and only a single row of stitching is visible on the right side of the garment (see image below). This is a really neat finish.
Fit
In regards to the fit, I can only comment on the size 6 dress and top. However, I had no issues, finding both to be 'suitably' loose fitting (see images below).
Dress:
I am more on the shorter side, coming in at approximately 155cm, and I found the length to be really nice, finishing at my mid shin. The pattern does include quite a deep hem (4.5cm) so there is a little room to play around. Furthermore, given the almost rectangular shape of the skirt pattern piece, it would be straightforward to add additional length.
I found that the sleeves sit really nicely on the shoulder (something I always look out for).
If I was to make a third (which is highly likely), I would probably experiment with adding side seam pockets. I find these to be a nice inclusion in styles like this.
Top:
The top is intended to be cropped, finishing nicely just below the natural waist. This top perfect pairs with a high-waisted skirt or trousers. Again, if you did find you wanted this top to be a little longer, adding length to to the pattern piece for the frill would be fairly straightforward.
Please get in touch or leave me a comment. I would love to know if you found this article helpful. Maybe I have inspired you to check out the Florence pattern, or the beautiful products on offer at Merchant & Mills.
Thanks for reading.
Emma xx
This is a personal blog. Any views or opinions contained on this site are my own. I am not affiliated with any brands, products, or organisations mentioned, and do not receive any sponsorship, payment, or other compensation for any of the content on this site.


